The viewer is designed to allow efficient viewing with minimal head, eye, and hand movements. Most common viewing activities can be controlled with a simple mouse, without even needing to access a toolbar or toolbox.
Built-In Mouse Functions | ||
|---|---|---|
 |
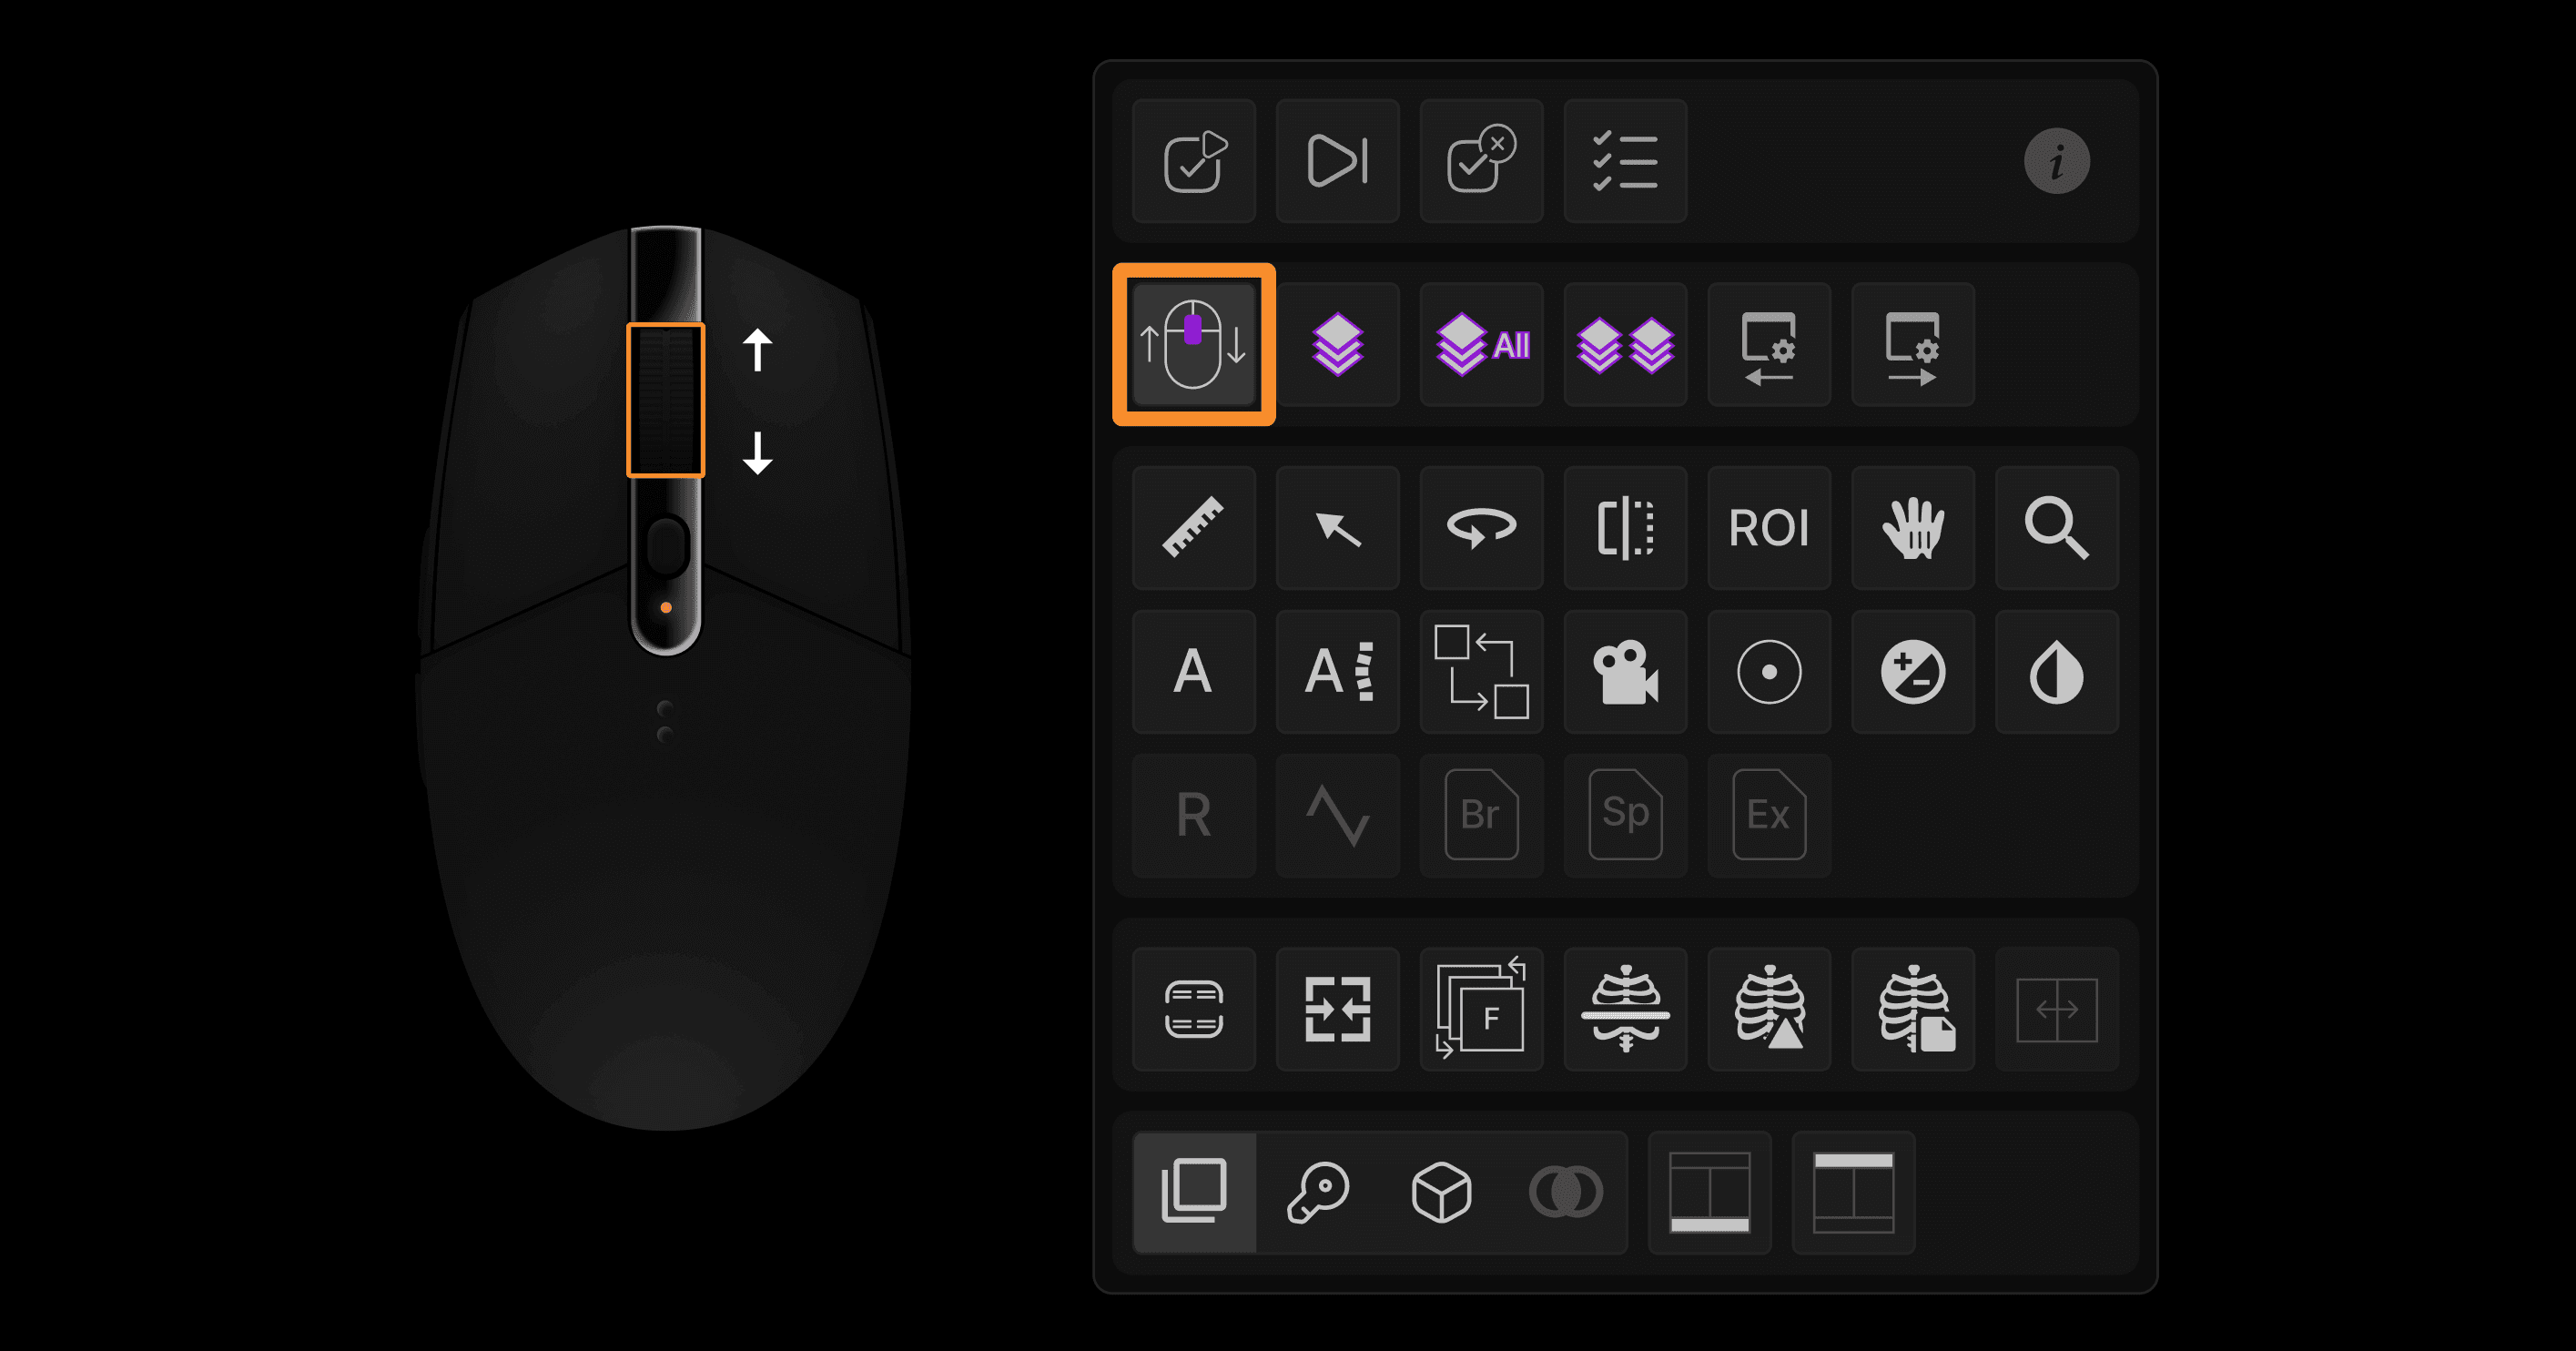
Paging | |||||||||||||||
|---|---|---|---|---|---|---|---|---|---|---|---|---|---|---|---|
| |||||||||||||||


Linked Paging | |
|---|---|
Action: Position the cursor near an image border (the peripheral 25% of the image, which you can think of as the viewport frame, is the region when actions affect the current image and the nearest neighbouring image). Then use the left press-push forward/backward method or the mouse wheel method to page through the desired series. | |
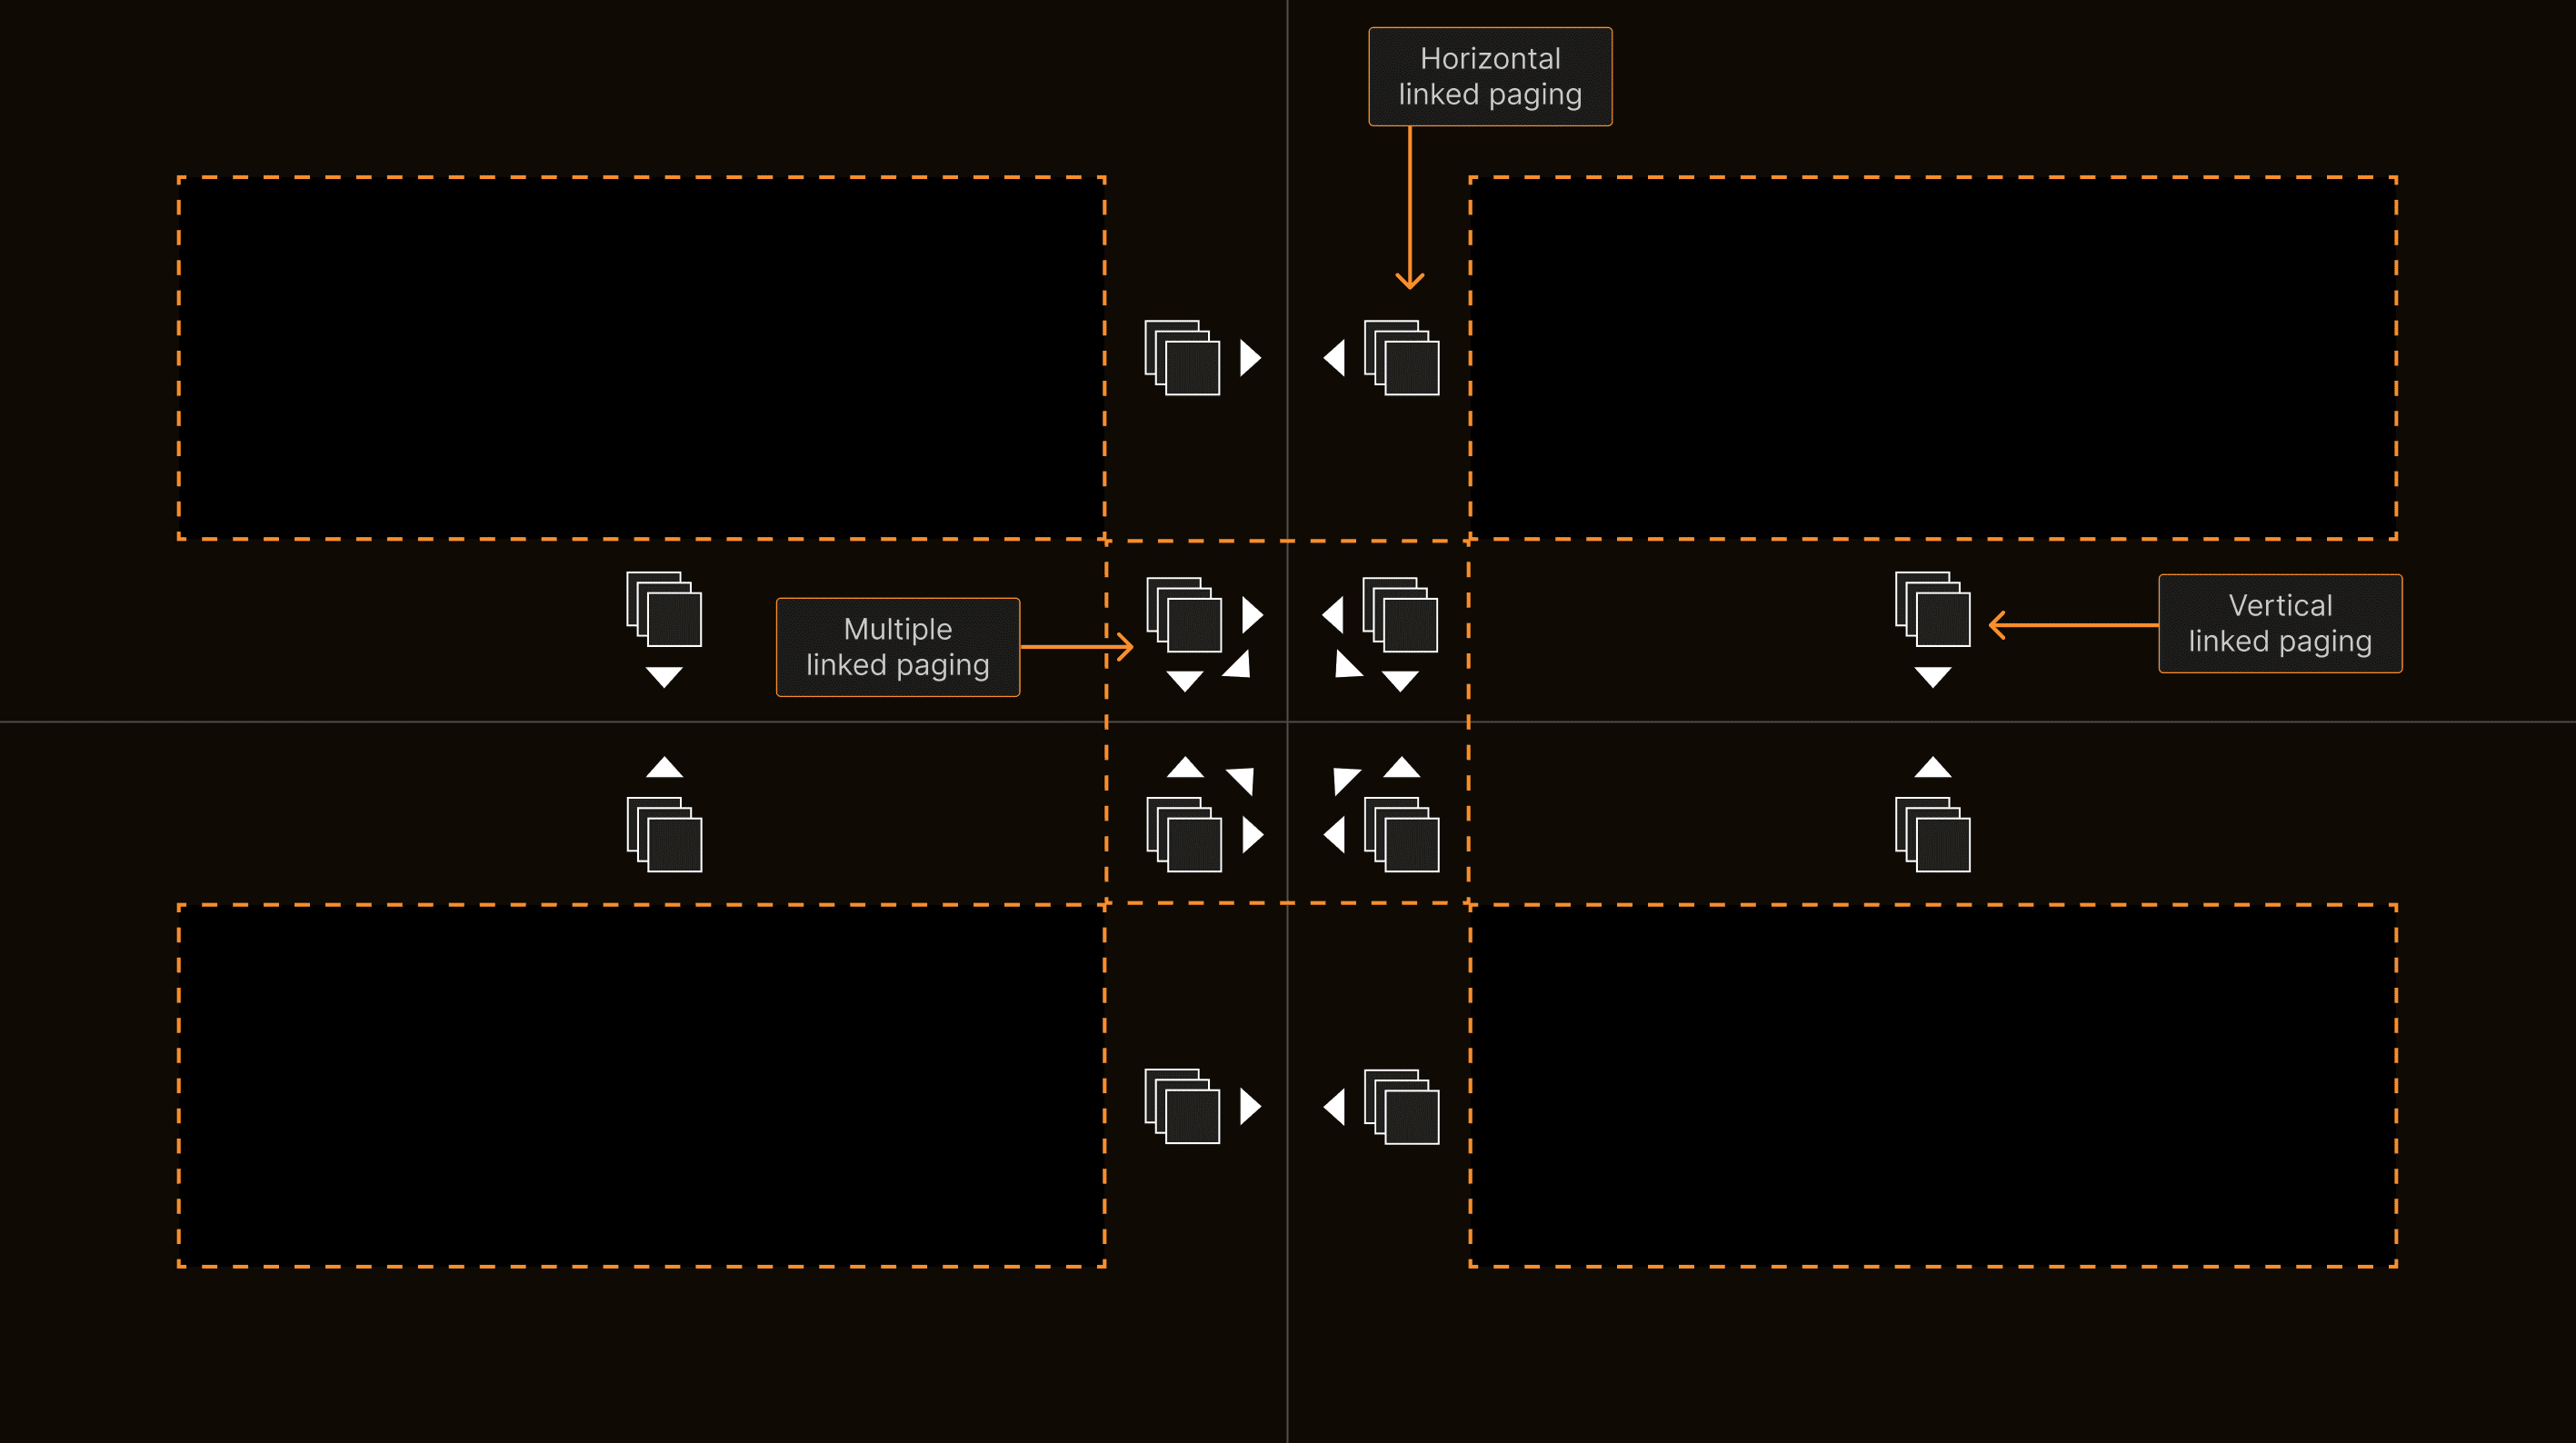 | |
Notice that the cursor image changes when you move it near an image border. This shows that you are controlling the neighbouring series or neighbouring three series (if near a corner bordering four viewports). Therefore, you can easily control whether you page through a single series or multiple neighbouring series. Only series in the same image plane will page synchronously. The system automatically chooses the series under the cursor as the controller, which is important to realize when neighbouring series have different slice thicknesses and increments. It also automatically and properly chooses to link paging via slice increment or slice number depending on the type of image. |
3D Targeting | |
|---|---|
Action: When using the various tools (Page, PageAll, Swap Series, Window/Level, Pan, Magnify), hold the mouse still for about 0.3 seconds while pressing the left mouse button. | |
 | |
The 3D Cursor tool will appear. The system will show the specified location on all displayed series that have a common DICOM frame of reference, and a target-shaped icon will specify the matching location. Continue to press the left button while dragging the mouse to control all displayed series with the same DICOM frame of reference. Release the left button to return to the prior tool. |
Toggle to 1:1 and Back | |
|---|---|
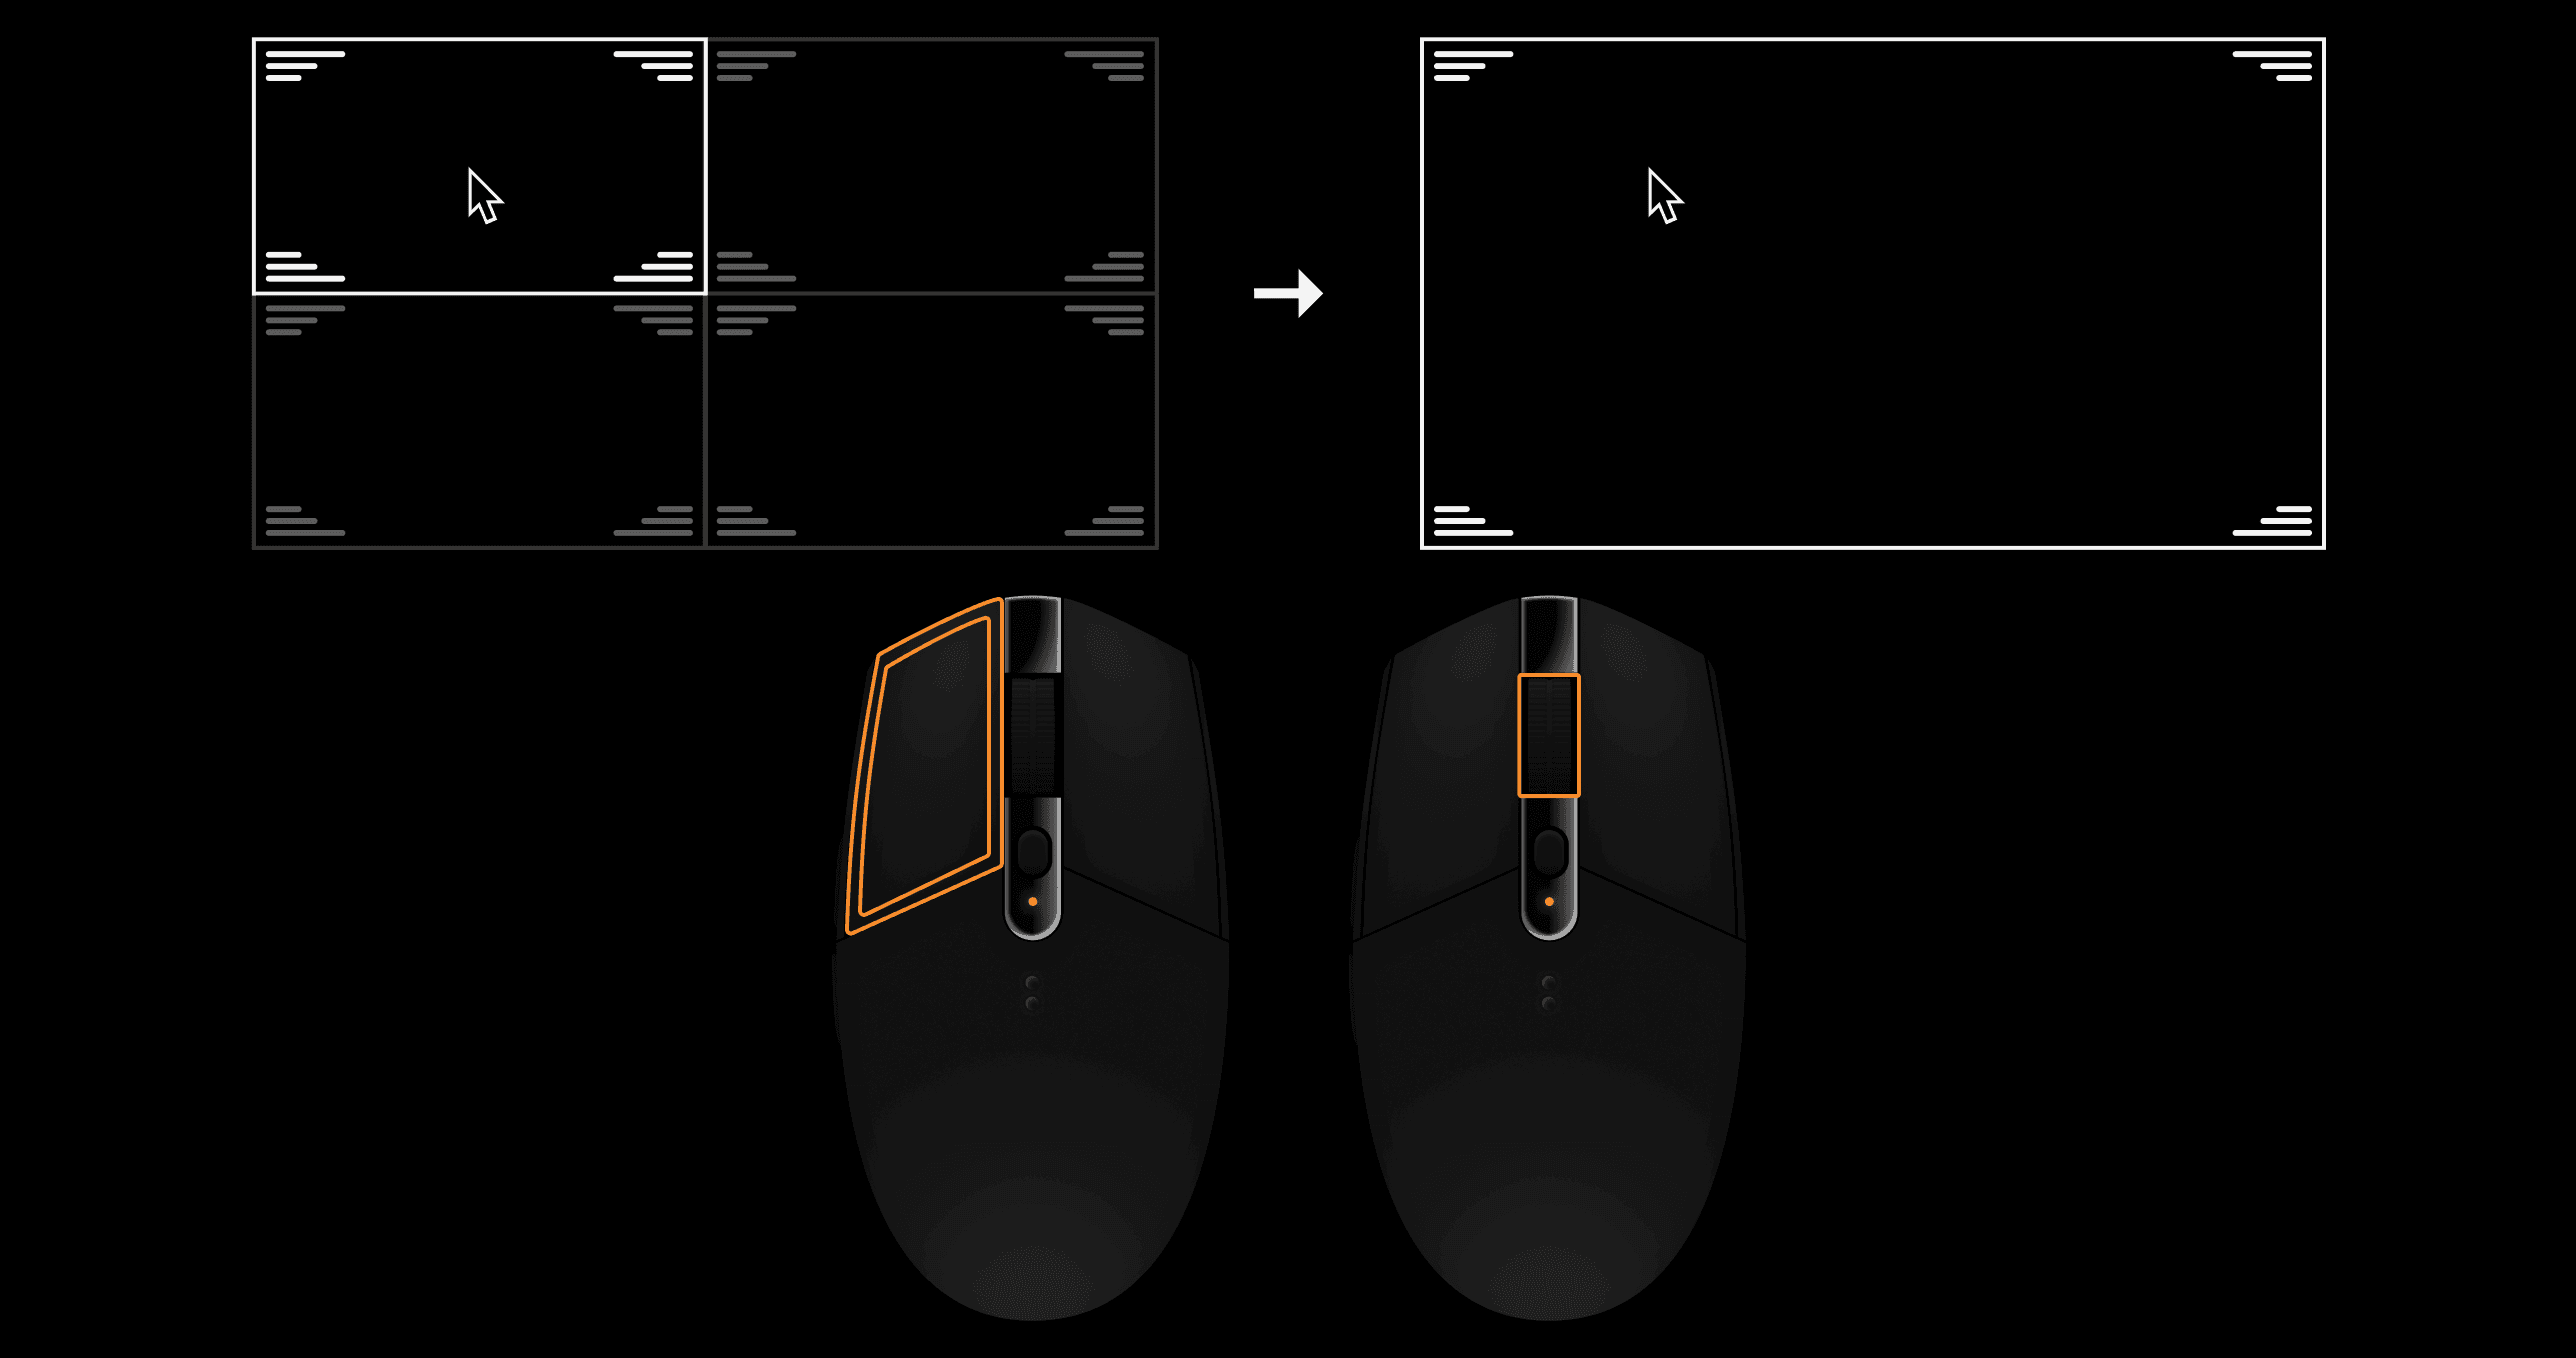
Action: Center wheel click or left double click. | |
 |
Smart Magnify | |
|---|---|
Action: Move the cursor to a desired location. Hold down the wheel and push the mouse. Pull to de-magnify. Release to stop. | |
 |
Window/Level | |
|---|---|
Action: Press the right and left mouse buttons, then push/pull to adjust level, drag right/left to adjust window. | |
 | |
For CT, PT, and NM images, there are special Window and Level functions. For CT, in the lower right of each viewport, a window/level icon is present. Right click on the icon and a menu of present CT window/level settings appears. Click on the text of any line in the menu to cause the series to change to that setting. You can also set your favorite window/level presets. To do so, right click on that same window/level icon at the lower right of the viewport, then select the checkboxes you desire in the order you desire. The system assigned number lock keyboard shortcuts for your desired window/level presets. You can see the assigned numbers when you hover the cursor over the checkboxes. Now that you have set your favorites, you have two options when you want to quickly flip between different pre-set window/level settings:
Configurating color presets for PT and NM images works in exactly the same way. |
Open Toolbox | |
|---|---|
Action: Right press while holding the mouse still 0.3 seconds to display the toolbox, then drag over the desired tool, then release to select the tool. This way, you can select a tool without dragging to a toolbar and with just one press/release action. However, if you don’t like this method, access the toolbar with the T shortcut. Remember, as with any shortcut key, you can set a mouse button or keypad to press T. For many tools, after the tool is selected, a right click displays a menu of options. Hover over any tool in the toolbox to see the tooltip and keyboard shortcut. | |
 | |
TIP: While it may be tempting to use the toolbar near the top of the display, the toolbox is much more efficient. Instead of dragging the mouse to the toolbar and moving your head and eyes to a small target away from the image, when you use toolbox, the tools come to you. Although the right-press – drag – release method is a little harder to master than clicking the T key, it allows access to tools with half as many clicks. Please also remember that the toolbox also includes the exam navigation keys. Use the toolbox to navigate to the next exam...it’s faster and easier! |
Pan | |
|---|---|
Action: Press the right mouse button while moving the mouse. | |
 |