Overview
This guide describes how to scan patient documentation.
Note: You may be prompted to install the Dynamsoft scanning software the first time you scan. If prompted, download and install the software. For details, see the "Install the Dynamsoft Software Development Kit" section.
Scan a document |
|---|
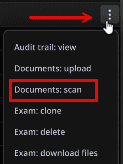
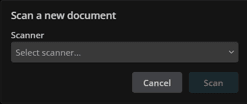
Turn the scanner on, place the document in the scanner, and then do the following: |
|
|
 |
|
 |
|
|
|
|
|
 |
|
 |
|
|
|
The Scan Documents tab closes. You can find the scanned documents in the Current Documents tab of the exam. |
Adjust page appearance and order |
|---|
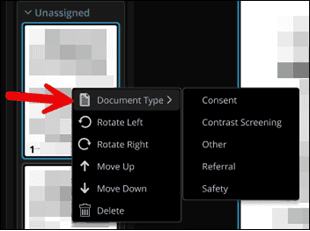
Before saving a scanned document, do the following in the thumbnail panel: |
|
|
|
Overview of the Scan Documents tab | |||||||||||||||
|---|---|---|---|---|---|---|---|---|---|---|---|---|---|---|---|
The Scan Documents tab is made up of three components:
| |||||||||||||||
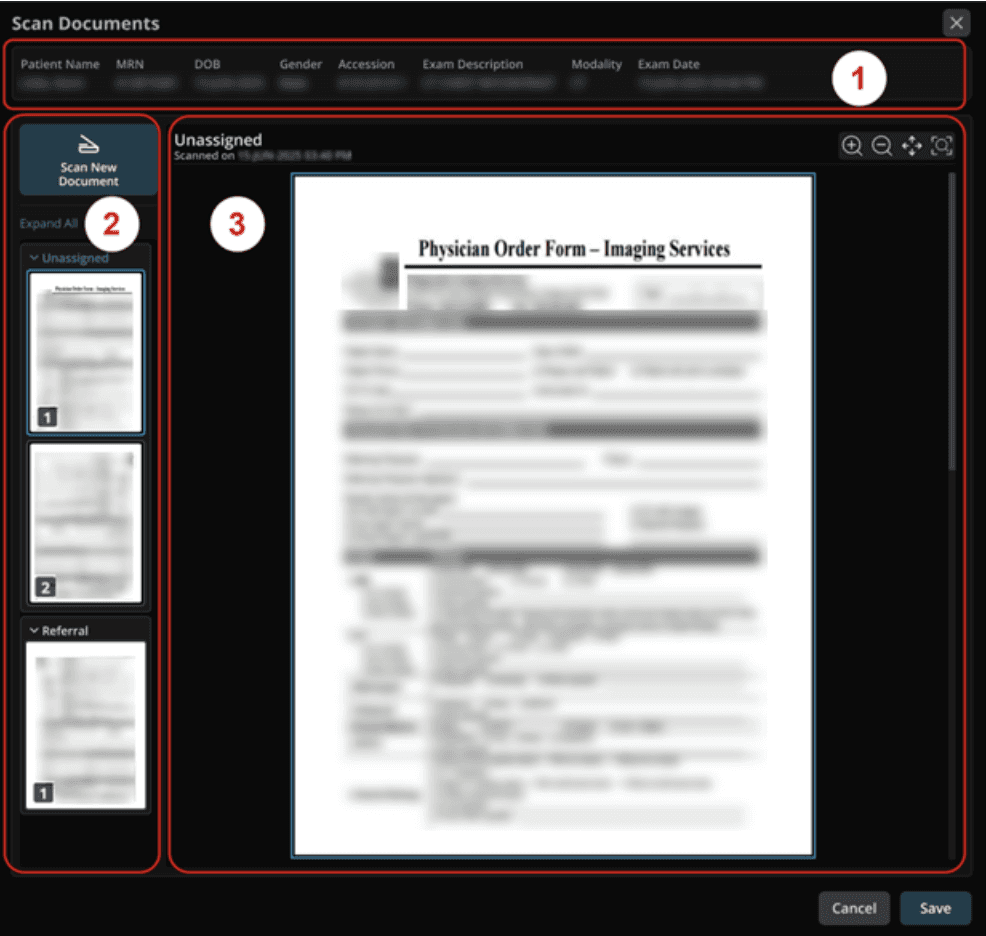 | |||||||||||||||
Information banner The information banner at the top displays information about the patient and the exam for which the documents are being scanned. | |||||||||||||||
Thumbnail panel The thumbnail panel displays thumbnails of the pages scanned during the session. The thumbnails are grouped by document type. Documents that are not yet assigned a type appear at the top of the panel in the Unassigned group. In the thumbnail panel, you can do the following:
For details about adjusting scanned pages, see the “Adjust page appearance and order” section. | |||||||||||||||
Viewing area The viewing area displays the scanned page selected in the thumbnail panel. The type of document and details about the scan are displayed at the top. You can use the buttons in the viewing area to change the view. | |||||||||||||||
Buttons in the viewing area
|


Support and installation |
|---|
To scan documents in Stratus Imaging and Workflow, the feature must be configured and enabled. The Dynamsoft Dynamic Web TWAIN Software Development Kit (SDK) must be also be installed on the workstation, and a supported scanner must be available. |
Supported scanners |
You can use TWAIN- or ICA-compatible scanners that are supported by the Dynamic Web TWAIN SDK. Common scanner manufacturers include Brother, Canon, Epson, and HP. Network scanners are supported with a compatible driver. For details on supported scanners, see the manufacturer’s website. |
Document scanning setup |
Document scanning is configured by Change Healthcare Support. Once configured, your PACS administrator can then enable or disable document scanning for your facility using the Scanner integration toggle. For details, contact Change Healthcare Support. |
Install the Dynamsoft Software Development Kit |
The Dynamsoft Dynamic Web TWAIN SDK includes the drivers required for document scanning and must be installed on the scanning workstation. Download and run the SDK installer If the drivers are not found when you first scan a document, you will be instructed to download the Dynamsoft Software Development Kit. Double-click the downloaded installer and follow the prompts on the screen. For assistance, contact your PACS administrator. |
Troubleshooting
If… | Possible causes | Try this |
|---|---|---|
You are unable to save scanned documents | Your PACS session has timed out. The scanner session has timed out. The authentication service is unavailable. |
|
You are unable to start or complete scanning documents | The system is unable to retrieve the patient or exam information. The authentication service is unavailable. The scanning service is interrupted. |
|
Your scanner is not in the list of scanners | The scanner is unplugged or not turned on. The scanner is not supported by the SDK. |
|